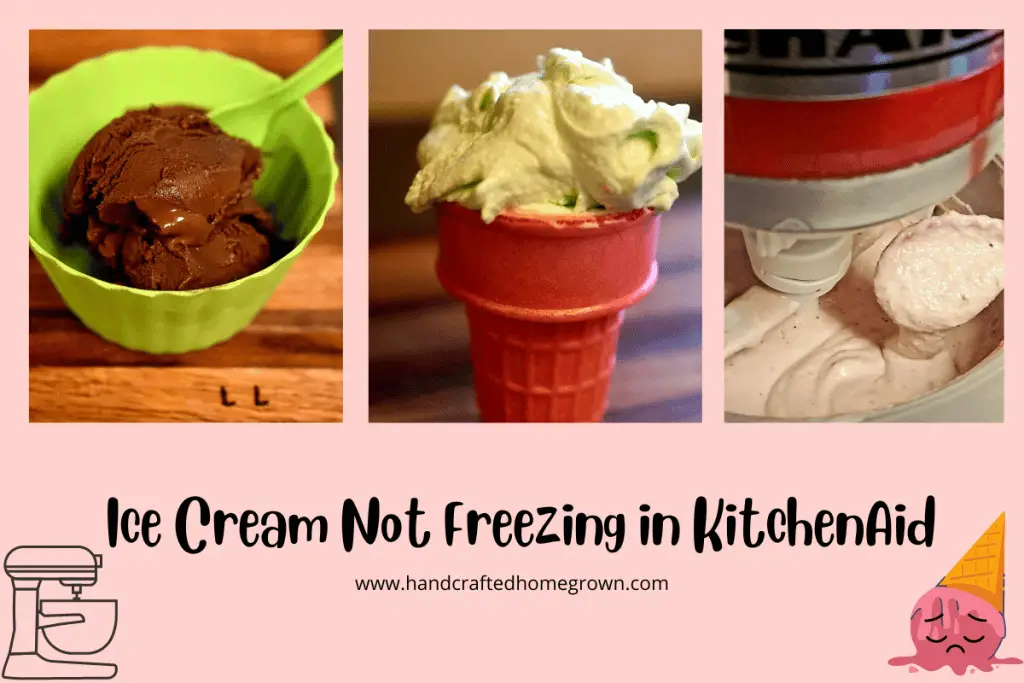
Ice Cream Not Freezing in KitchenAid
Your ice cream base is ready to churn, and you have your KitchenAid out and running, but your ice cream is not freezing in your KitchenAid attachment! If your ice cream isn’t setting up in your KitchenAid, let’s chat about a few reasons!
If ice cream is not freezing in your KitchenAid, there could be a few reasons causing this. A few common reasons for this are the freezer bowl isn’t frozen, your ice cream base wasn’t chilled, the temperature of the room is too hot, your ice cream bowl is defective or your recipe doesn’t have the right ratios of fat/sugar, etc.
Read on for a discussion on these items.
This site is a participant in the Amazon Associates program, as well as other affiliate programs. As an Amazon Associate, I earn from qualifying purchases. This post may contain some affiliate links for your convenience.
The KitchenAid Ice Cream Attachment Bowl Isn’t Frozen
First, it is very important to make sure your KitchenAid ice cream bowl is frozen. This is a special attachment you buy for the KitchenAid, so not your standard mixing bowl. You can get the KitchenAid brand or an off-brand attachment. Both work well – you can find more information on that here: How do I use my KitchenAid Ice Cream Maker?
It needs to be as cold as possible. You should be placing it in the back of your freezer and making sure the temp is set low in your freezer. You also need to freeze for at least 10 hours (but check the instructions with your specific attachment). I generally do it for 24 hours to be sure it is completely frozen.
When you take the bowl out of the freezer you shouldn’t hear any liquid slushing/moving within the bowl. It should be frozen solid. If you can hear the liquid moving around, then your bowl is not frozen and it is most likely due to the freezer not being cold enough or you haven’t let it freeze long enough.
The Ice Cream Base was not Chilled
You’re going to sense a theme here, but another reason your ice cream might not be freezing in your KitchenAid is the base wasn’t chilled. For the best possible result, you need to make sure you are putting a chilled base into a frozen ice cream bowl. If you’ve warmed up or cooked your base, there are a few ways to chill!
You can put it directly into your fridge and leave it to chill for 2-3 hours. This is a good option for ice cream bases that require full cooking, tempering eggs, etc. If I have the liquid hitting a full boil when prepping the base, I chill it for a few hours in the fridge.
Another option is to use a large bowl of ice water and place a smaller bowl in the ice water and use that smaller bowl to mix your base. If I’m only warming up milk to melt sugar, I will leave the cream in the fridge while I warm the milk up just enough to melt the sugar. Then I combine the milk with the rest of the ingredients with the chilled cream in that bowl sitting in the ice water. That helps especially if the room you’re in is very hot (spoiler alert for our next topic).
Another option would be to place the base in the freezer for minutes (you’ll have to use your judgment) so that the mixture becomes chilled.
Whatever you do, do not put a warm base into your frozen ice cream maker attachment.
The Humidity/Temperature in Your Room is Too High
Unfortunately, mother nature does play a part in this process. If it’s a very hot and humid day, and you’re feeling that in your kitchen when you’re trying to churn ice cream – it will play a part. It will be extra important in these cases that your freezer bowl is frozen and that your base is chilled. You’ll want to transfer the ice cream mixture quickly to the freezer.
Unfortunately, if it is too hot, it might be best to wait to churn your ice cream on a day that isn’t as warm. So make sure you’re planning ahead when you’re looking to make ice cream if you know it is going to be a very hot day.
The KitchenAid Ice Cream Attachment Bowl is Defective
Another reason your ice cream might not be freezing is your KitchenAid bowl is defective. There is a blue fluid inside the bowl, like a reusable ice pack that you would buy. So first, you need to make sure you’re not seeing any blue liquid leaking. If you do, you’ve got a problem!
When the bowl is not frozen, when you shake it, you’ll hear this liquid swishing around. If you have a bowl that doesn’t swish when shaken, there is a chance that the liquid has leaked out or was never in there. So if it’s a new attachment, you would want to return it to the manufacturer.
There is Something Wrong with your Recipe
Another issue, that might be harder to diagnose, is that your recipe has a flaw that is causing your ice cream to not freeze. You need to find a balance of fat, sugar, dairy, etc. to have the right texture. My suggestion would be to try a trusted, simple ice cream recipe first. Once you perfect that, you’ll get an idea of how your ice cream maker works and what you’re looking for. If you’ve ruled out all the other factors, then it is most likely your recipe. It might contain too much sugar, not enough fat, etc.
I first started with this simple vanilla ice cream recipe from the Kitchn, and would recommend this to a beginner!
Wrap Up
If you liked this post, it would mean a lot if you would follow me on Facebook, Pinterest, or Instagram. If you use #handcraftedhomegrown on Instagram, I’ll be watching! 🙂
It would really help me if you pinned this post on Pinterest! Thank you!