Why is my Homemade Ice Cream So Hard?
You’ve made yourself some delicious homemade ice cream, and it’s time to pull it out of the freezer to enjoy. You try to put the ice cream scoop through and it is hard as a rock! What gives?! Why is my homemade ice cream so hard? Let’s discuss it!
On my ice cream-making journey, I’ve read through hundreds of Facebook posts, websites, Reddit posts, etc., and compiled everything I’ve learned here! But making ice cream isn’t a black-and-white adventure. It can take a lot of experimenting to figure out how to achieve your desired taste and texture!

This site is a participant in the Amazon Associates program, as well as other affiliate programs. As an Amazon Associate, I earn from qualifying purchases. This post may contain some affiliate links for your convenience.
Potential Problem #1 – Churned Too Slow
The ideal ice cream will have small crystals after churning. This makes the ice cream softer and creamier. Churning too slow doesn’t mean the physical speed at which your machine is working – but the time it takes to get to that soft serve texture in your ice cream machine is taking too long. A few reasons this could be happening are:
- The ice cream base was not chilled prior to putting into the ice cream maker. If you put a warm ice cream base into your ice cream machine, it will take longer to churn. By making sure everything is as cold as possible, it reduces the time it takes to churn
- If using a machine with a frozen bowl (like my KitchenAid ice cream attachment) – ensure the bowl is completely frozen. The ice cream bowl has that blue liquid inside you see in those ice packs. That should be completely frozen. You should not hear any splashing around when handling the bowl out of the freezer. If you are, make sure that your freezer is at the lowest setting.
Looking to read more about the art of making ice cream? The Perfect Scoop by David Lebovitz comes highly recommended by many home ice cream makers!
Potential Problem #2 – Not Enough Sugar
When making ice cream, sugar plays a dual role. Of course, it gives us that sweet flavor. But also, sugar plays an important role in making sure your ice cream remains soft. Make sure your recipe has the proper balance of sugar for both taste and texture.
When I first started making ice cream, I tried cutting back the sugar in the recipes to make them a bit healthier. I quickly understood why this was not a great idea. A few batches of my ice cream were impossible to scoop out of the freezer and some took over 20 minutes on the counter to become scoopable. I still play around when making recipes to find balance. But just be aware when you start reducing sugar, it impacts a lot more than the taste of the ice cream.
Potential Problem #3 – Not Enough Air Whipped In
When you buy ice cream, it often has a softer texture out of the freezer than homemade ice cream. That might be because commercially made ice cream uses a process called overrun to put air into the ice cream. By adding more air, the ice cream becomes less dense and provides a softer texture. You can read more about that here. However, there really is not much you can do at home to achieve this same result by adding air. But it is something you should be aware of if comparing your homemade ice cream to store-bought ice cream.
This chocolate gelato recipe will not disappoint! Check it out here.
Potential Problem #4 – Not Enough Fat
Similar to the above notes on sugar, having not enough fat in your ice cream can also cause it to freeze very hard. Fat does not freeze, so it lends to a softer texture. Fat is added to ice cream typically through the dairy products being chosen. So if you used lesser fatty milk than the recipe suggested, this could be playing a part in your ice cream freezing very hard.
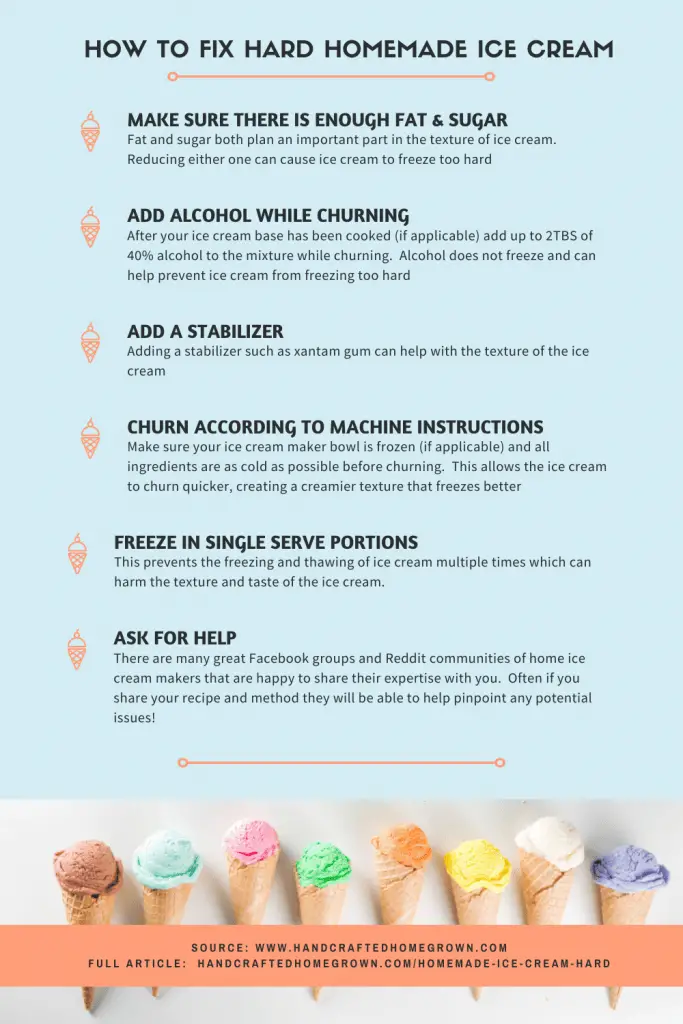
Suggestions for Hard Homemade Ice Cream
If you’ve made it this far, you probably already have a good idea as to why your ice cream is too hard. But here is a summary of things you can do to help your homemade ice cream from getting rock-hard in the freezer. This can be an overwhelming list. I highly recommend using a tried and true recipe like this one, and once you have that down pat – branch out to some of the other techniques.
- Increase the amount of sugar or fat in the recipe
- As discussed above, sugar and fat play an important role in making sure you have a soft texture out of the freezer. Make sure you’re using a recipe with enough sugar and fat.
- Add alcohol while churning (after cooking) – up to 2 Tablespoons per quart. Make sure the alcohol is at least 40% alcohol. Vodka is neutral tasting. You won’t taste the alcohol, but since alcohol does not freeze it can help the ice cream from freezing so hard!
- Trying sugar alternatives such as those below can help achieve a softer texture
- Honey
- Dextrose powder
- Freeze in single-serve portions. Allow thawing before enjoying. This avoids the thawing and refreezing of ice cream each time you take a portion out of the container. This can help preserve the integrity of the texture of your ice cream.
- Add a stabilizer to your ice cream such as xantham gum can help with the texture
- Make sure all ingredients are cold and your freezer bowl (if applicable) is frozen properly prior to churning
- Ask for help! I have found the following resources great for finding answers to my questions:
- Enjoy homemade ice cream straight after churning – without a pit stop in the freezer
- Ice cream right after being churned should be a soft serve consistency. If you’re struggling with a recipe or technique, but enjoy the ice cream right after churning – eat it then! I make strawberry ice cream that does not taste as good after freezing due to texture and the fresh strawberry taste losing some of its pizzaz after being frozen. So now, we just enjoy eating it right after it is done churning!
Wrap Up
If you liked this post, it would mean a lot if you would follow me on Facebook, Pinterest, or Instagram. If you use #handcraftedhomegrown on Instagram, I’ll be watching! 🙂
It would really help me if you pinned this post on Pinterest! Thank you!