How to Make a Paper Flower Shadow Box
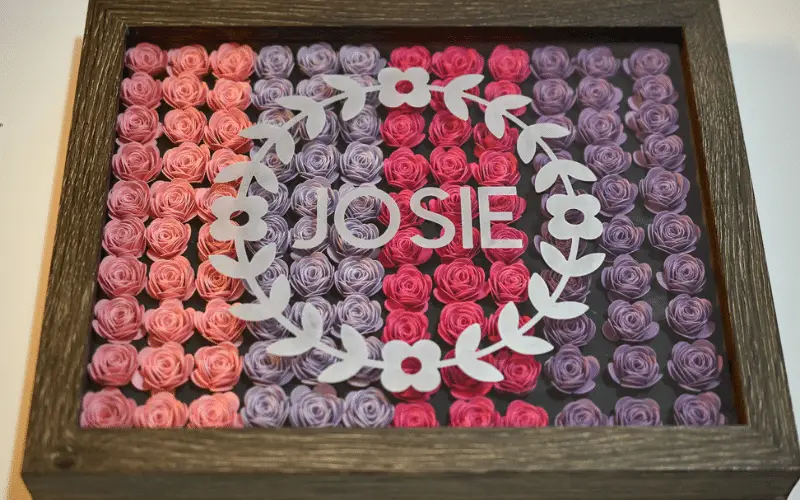
This paper flower shadow box is completed with etched glass. It makes for a great gift.
I had been debating getting a Cricut for awhile. One Sunday morning (more like the middle of the night), sleep deprived with a baby that wouldn’t sleep on my chest – I was naturally scrolling through Facebook. I saw a post where someone had created beautiful paper flowers. That was the final push I needed and I purchased a Cricut Maker at about 3am! So, one of the first projects I completed was a paper flower shadow box with rolled paper flowers and etched glass. This will be the perfect decoration for my daughter’s room. There are so many possibilities with these etched shadow boxes.

This site is a participant in the Amazon Associates program, as well as other affiliate programs. As an Amazon Associate, I earn from qualifying purchases. This post may contain some affiliate links for your convenience.
Paper Flowers for the Shadow Box
The shadow box contains 120 individually wrapped paper flowers. The flower I used is right from Cricut Design Space and was included in the Cricut Access membership. It is flower #M3D7E1. I used the default size that it comes from the library at 3.341 x 3.107. I did try using bigger flowers, but the shadow box I purchased was quite shallow and larger flowers would not fit. So I had to keep them small to make sure I could get the box back together. I used super glue at first to assemble the flowers, but I didn’t like it because I was gluing my fingers together or to the flowers! Most people recommend hot glue, but with two little kids this wasn’t ideal for me either. I ended up using Art Glitter Glue – and I love it! Never going back!
Stencil Design for the Etched Glass
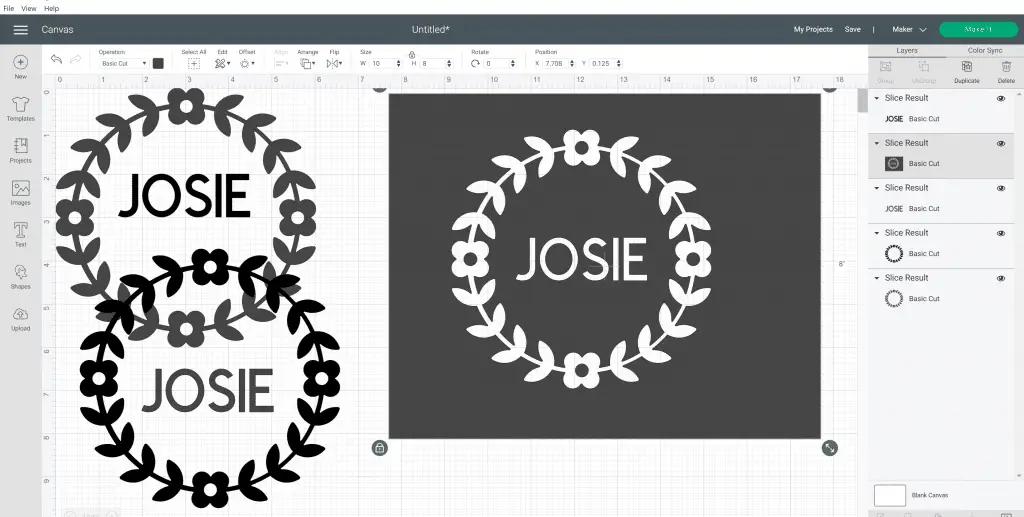
I created the stencil right in Cricut’s design space, here are the steps I took:
- Since this is a 8×10 box, I first inserted a rectangle into Design Space of this size so I could see the space I was working with.
- Then created the image I wanted on the glass. This was Josie’s name in font Cricut Sans and the wreath which is image #M89D0438. I aligned the wreath and the name on top of the square as if it was the glass itself. Once I was happy with size, placement, etc. It was time to slice!
- You can only slice 2 layers at a time. So first I selected the Rectangle layer and the wreath layer and sliced by using the layers menu and holding shift and clicking just those two. Once those 2 were sliced, I selected the text layer and the square layer and sliced again. This results in several new layers:
- 2 Text layers, in my case “Josie” layers
- 2 wreath layers
- The square with the wreath and the Josie cut out
- I deleted all the layers except the square with the cut outs and I now have the template for my stencil! I cut my stencil out of permanent vinyl.
Glass Etching
After creating the stencil and printing it out of permanent vinyl, I got ready to go! I cleaned the glass with an alcohol swab. Once dry, I applied the stencil. You need to be ready to go right after apply the stencil, especially if you do it out of permanent. The stencil was made out of permanent vinyl for the strongest barrier for the Armor Etch. I then followed all the directions on the armor etch (apply, let set, rinse – please make sure to read the bottle and follow the safety protocol – gloves, eye wear, etc.). This was so simple to do! After I rinsed it didn’t look like the glass was etched, but it was! The stencil was easy to remove and did a great job only etching the glass where I wanted!
Final Assembly of the Paper Flower Shadow Box
I chose black cardstock and glued all the flowers to it using the Art Glitter Glue. I found a small dab on the flower and then holding for a few seconds on the cardstock was the way to go. Make sure you cut your card stock to the proper size. You want to make sure where you’re gluing your flowers will allow it to all go back together. My shadow box had an insert, so I traced the insert onto the cardstock and cut it out, so I knew everything would go back together.
I will confess that when you’re looking at this shadow box straight on, it isn’t as easy to see the etching. I think in the future I will explore maybe a combination of etching and vinyl on the glass. But overall I am very pleased with this project!
If you make a paper flower shadow box, I’d love to see it!
Update: Enhancing the Etching with Rub N Buff
After experimenting more with glass etching, I found Rub N Buff made this project pop! Find more information here: