How to Make Simple Cricut Halloween Project
Simple Dollar Tree Halloween Decoration
Lets talk about a really simple, Cricut Halloween Project that uses supplies from Dollar Tree. This would be very easy to customize for any holiday. This is also something you can do with your kids!
I was never really one for decoration for holidays. However, my husband and I purchased a home together two years ago and now have two small children, I am starting to really enjoy decorating for the holidays – especially making decorations myself.
Halloween is 3 months away and I’ve recently been excited to start making decorations. So, I decided to see what I had on hand from a recent Dollar Tree shopping trip. I recently completed a reverse canvas project, and had a lot of gray paint let from that. Because I really love those reverse canvas projects, I am inspired to do something similar on a smaller scale.
Supplies:
- Dollar tree canvases – they are 4″ x 6″ and come in a 3 pack for 1 dollar!
- Dollar tree twine
- Paint and Paint brush – I had this one hand, but I’m sure Dollar Tree would have great options.
- Hot glue gun and glue sticks
- HTV vinyl and Iron to apply
- Way to cut out your images, I used a Cricut Maker
- If you are using Cricut Design space, find my project here.
Steps:
- If you choose, paint your canvas. I decided to paint my canvases gray. I painted them and left them overnight to dry. Mine did require two coats of paint.
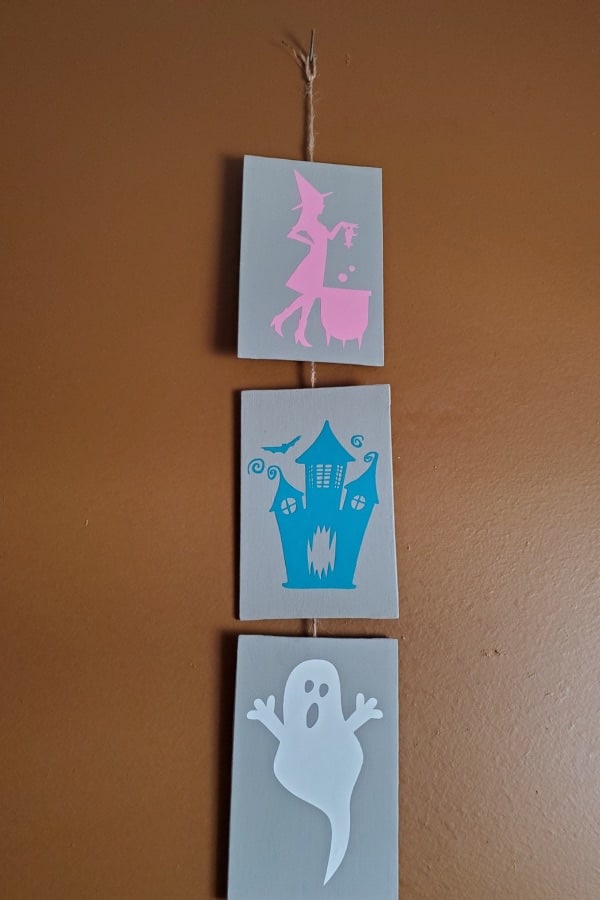
- Next, I headed to Design Space to find some images I would like to use on my canvas, these images I chose were: #M3DA0D, #M8DB1B9D and #MF7496DE which were all included in my Cricut Access subscription
- I sized my images and cut out onto the HTV colors that spoke to me. I decided to go with some non-traditional “halloween” colors to see how that would look. I’m really pleased with how it came out. Don’t forget to mirror your image, I use the green mat, HTV setting with extra pressure. Be sure to make sure you’re following the instructions that come with the vinyl on which is the cut side! I have made that mistake too many times!
- Next apply the HTV to the canvas following the instructions on my vinyl – using an iron.
- Cut a piece of twine about 20 inches long long, allowing for about an inch in-between the canvases and a few inches at the top.
- After I laid out my canvases and knew what order I wanted them aligned in, I put a dab of hot glue in the center top of the bottom canvas, and glued the bottom length of the twine to the canvas. Then I added the middle and top canvases, leaving about an inch in between. (See photo below that shows my method, forgive the green Kitchen table!).
- Create a small loop at the top and it was ready to hang!

Thanks for stopping by – find me on Facebook!
Hopefully this simple Cricut Halloween project inspired you to create something! I would love to see what you make. You can find me in my newly created Facebook Group, which I’m trying to grow. It would be amazing if you joined! You can find me there with any questions, comments or suggestions. I look forward to chatting with you! Click me to get to the Facebook group!