Armour Etch Glass Etching Cream and Rub N Buff
Armour Etch, a glass etching cream, is a great addition to your crafting tool box and combined with Rub N Buff it makes for beautiful projects. Simple to use and opens up a lot of crafting possibilities. I “experimented” using the cream, Rub N Buff to find the best results. Don’t miss my “Lessons Learned” section below on how to get the best glass etching results!
Shop for Rub N Buff here.
This site is a participant in the Amazon Associates program, as well as other affiliate programs. As an Amazon Associate, I earn from qualifying purchases. This post may contain some affiliate links for your convenience.
Materials Used
These are the exact materials I used and I think all of them were great!
- Etching Cream – Armour Etch
- Glass Coasters
- Cricut Maker Machine
- Oracle 651 Permanent Vinyl
- Paint Brushes
- Rub n Buff – Note – these tubs are SO Tiny, see picture below. But a little went a very long way.
- Towels

What Surfaces can Armour Etch be used on?
Armour Etch can be used on windows, mirrors and household glassware. It will not work on plastic or some Pyrex. Although, etching Pyrex is a a very popular project on Pinterest. Glass dishes are manufactured in two ways. One of the ways creates a plastic coating on the outside of the Pyrex. Since this product doesn’t work on plastic, it will not be able to etch glass manufactured that way. The only way to know for sure if it will work or not is to test a small amount of Armour Etch on the glass. It does seem through looking at Amazon reviews and other blogs that a lot of people have success etching Pyrex!
Experimenting with Armour Etch – Glass Etching Cream
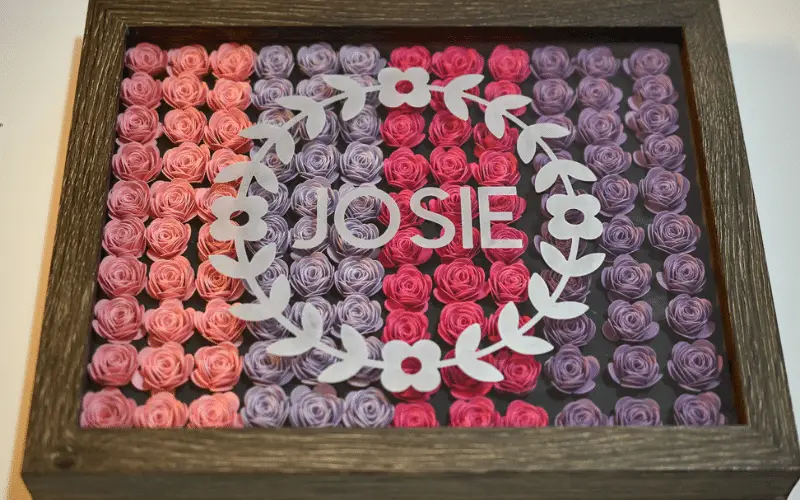
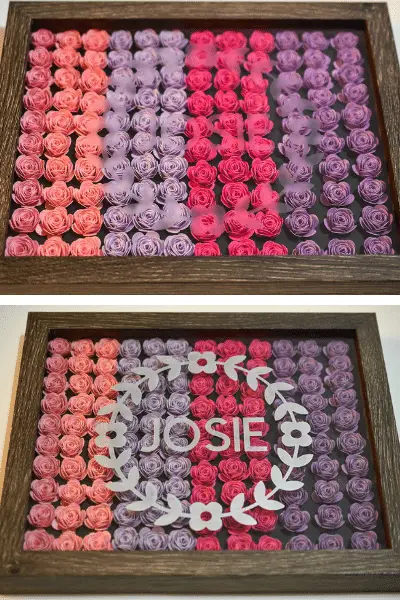
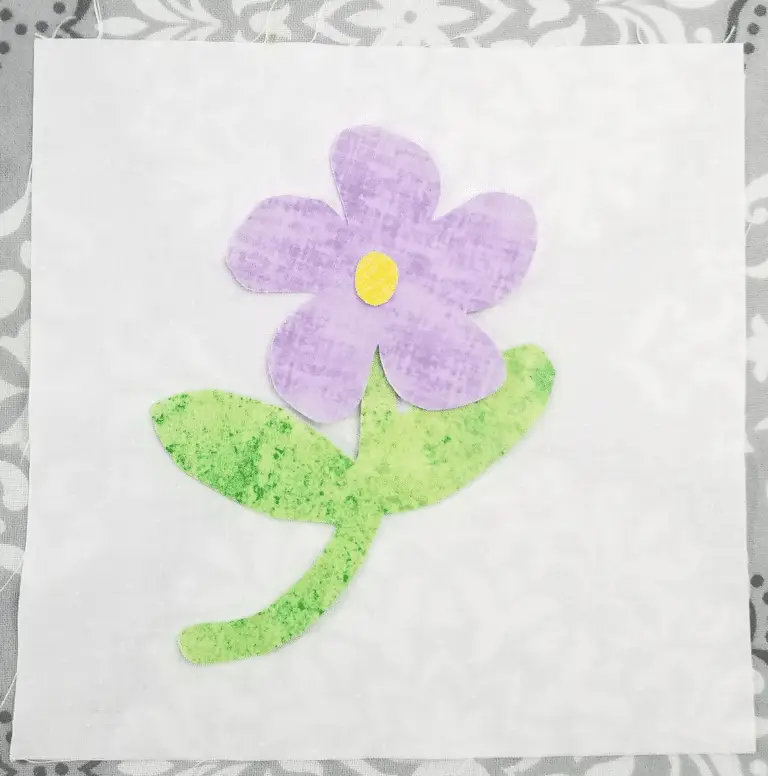
Shortly after I got my Cricut, I tried glass etching cream for the first time on a paper flower shadow box I made my daughter. The process is so quick and easy. The product I used was Armour Etch and I decided I wanted to do a little experiment with this etching cream on some glass coasters I have. I plan to try etching with the Armour Etch glass etching cream three ways to see what produces the best results. While I love the shadow box I made, I do wish the etching was more prominent when viewing it from the front straight on (see update below on how Rub n Buff transformed my shadow box!).
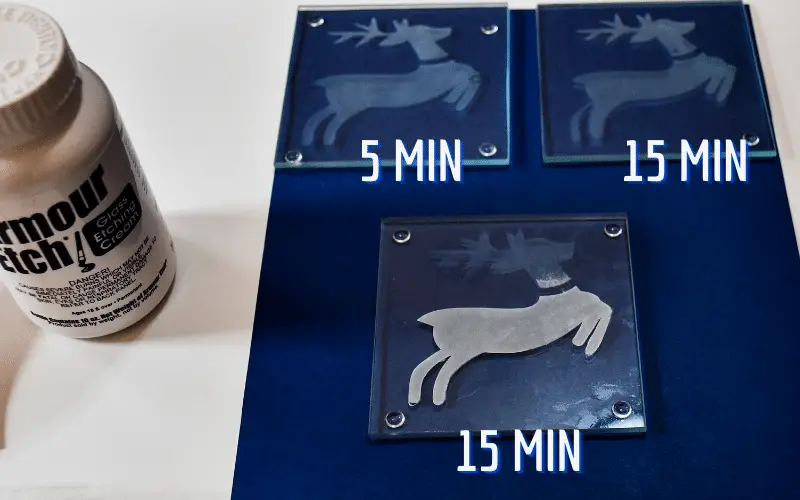
- Leave the Armour Etching cream on for 5 minutes
- Leave on for 15 minutes
- Leaving the glass etching cream on for 15 minutes and using a silver Rub n Buff
Creating the Stencil with my Cricut for the Glass Coaster
The coasters are 4 inches square, so the stencils are made to fit the coaster. To do this, I did the following.
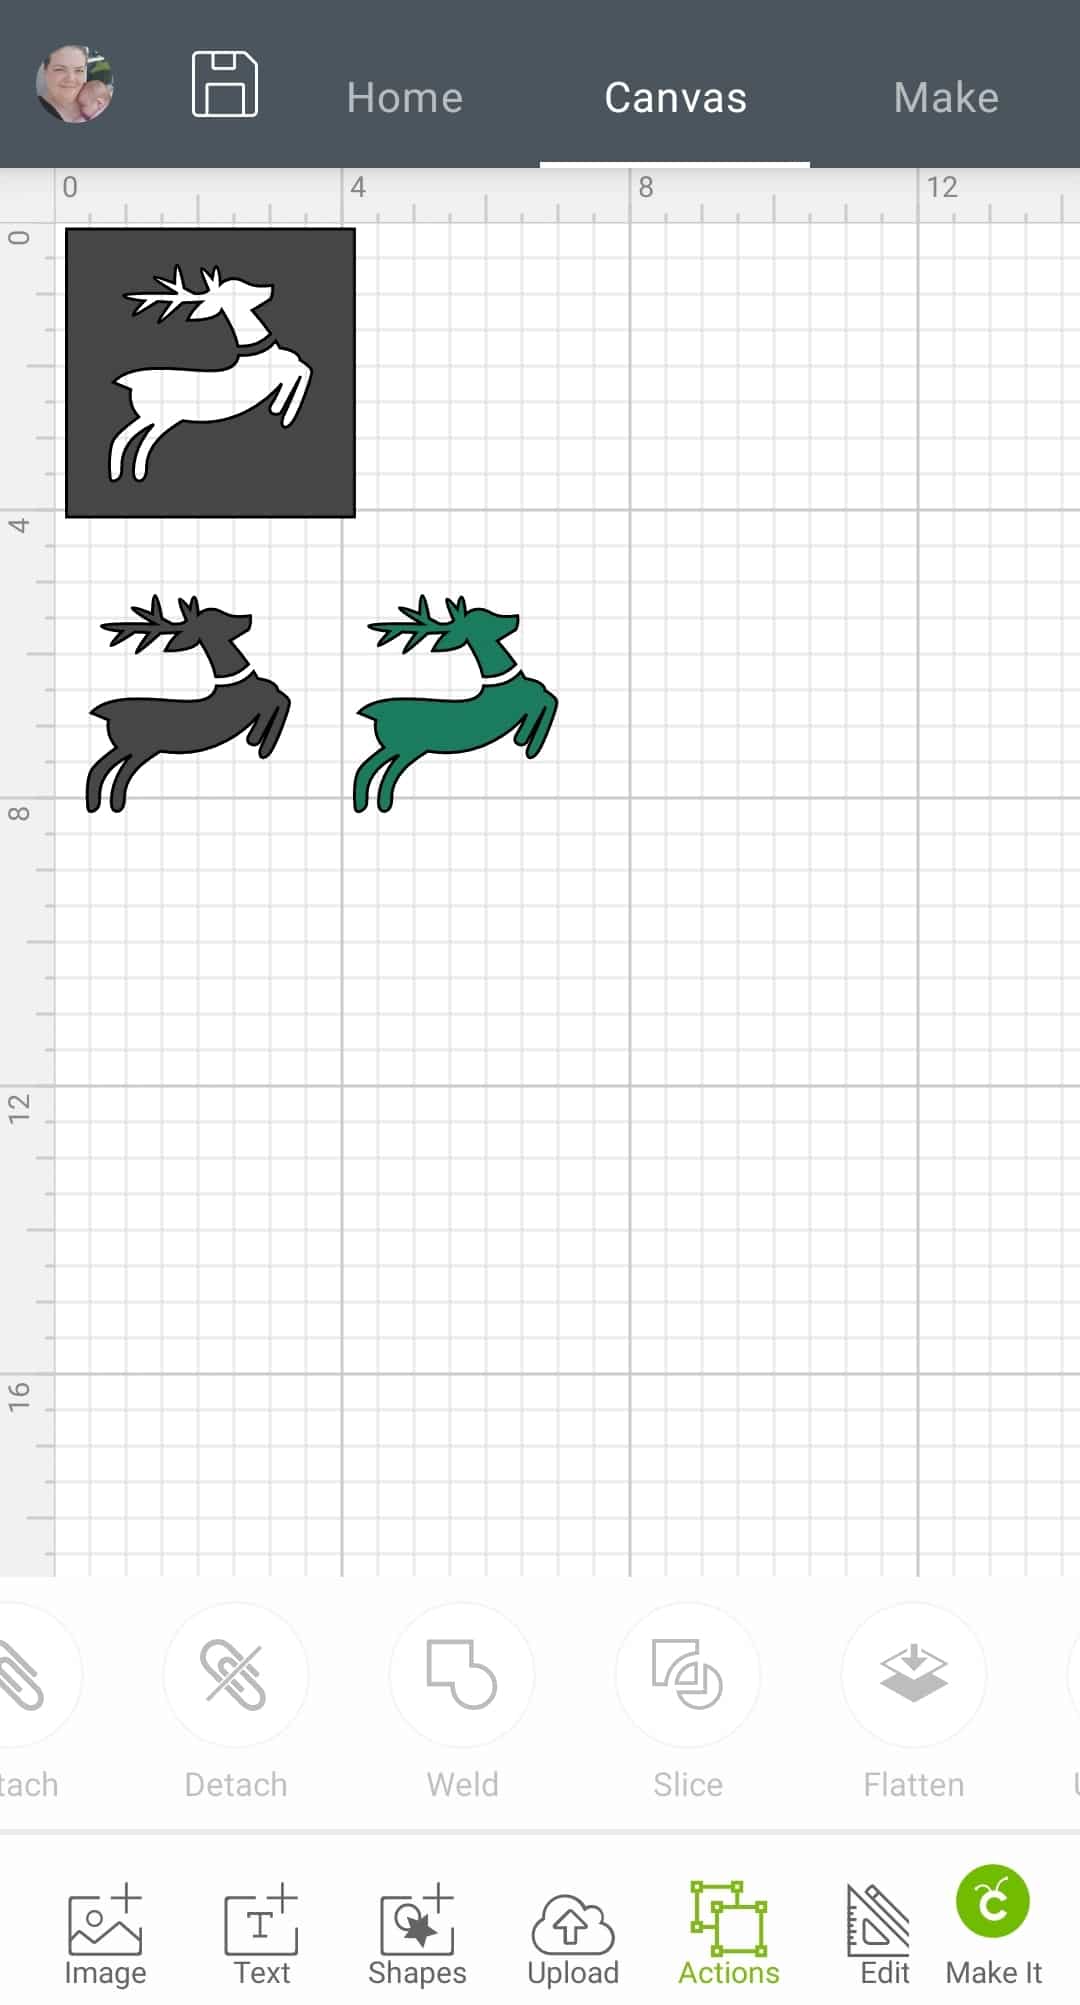
- In Cricut Design Space, insert a square from the shapes menu
- Tap “Edit” and resize the square to the size needed, I’m doing 4×4
- Find the design you want to stencil onto the coaster. In my case I chose image “Reindeer” #M7CC0022 in Cricut’s Design Space
- Align the reindeer within the square leaving enough room around the reindeer to protect the areas that will not be etched
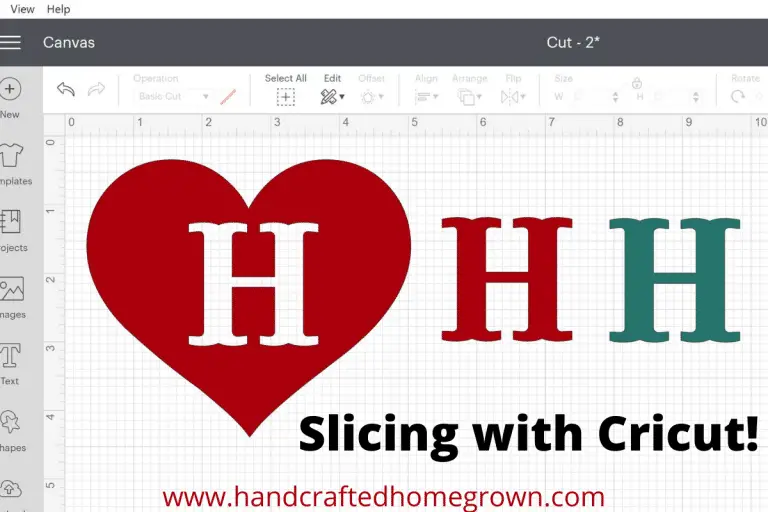
- Select the reindeer and the square and go to edit > slice. After slicing, remove the extra shapes (2 extra reindeer). You want to be left with a square with a reindeer cut out of it (see photo below).
- I used permanent vinyl to make my stencil. I cut this on my Cricut, and reverse weeded it. Meaning – I peel off the background and leave the reindeer itself on the vinyl backing sheet. Now I can use the reindeer on a future project. The stencil is to protect the areas you do not want etched.
Preparing the Surface and Applying the Stencil
- Clean the surface with alcohol – I bought some alcohol pads that I use
- Pull the background off very carefully so it does not stick to itself. Applying the stencil was tricky for me this way. I ended up realizing that folding it in half horizontally and starting at the bottom and slowly working my way up was the best. Go very slow and get your stencil applied with as few bubbles as you can. There are a lot of tricks out there regarding parchment paper or transfer paper if you’re struggling with this.
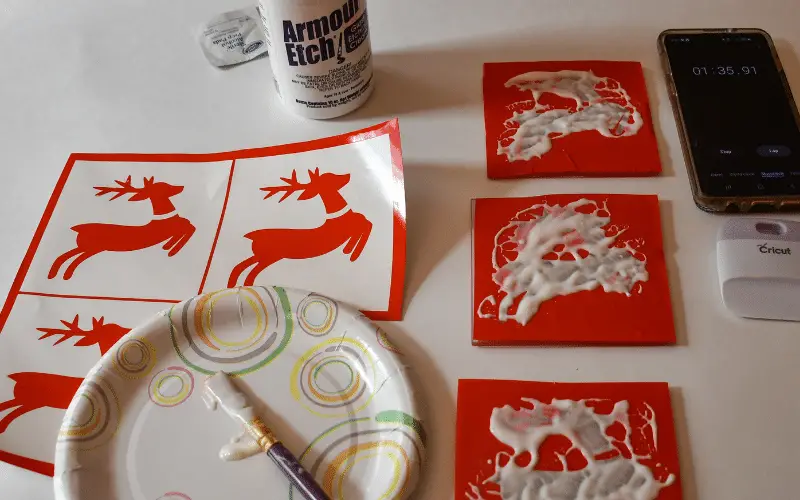
Using the Etching Cream
- Read your Armour Etch packing to make sure you’re following all the safety procedures recommended
- Apply the etching cream to the surface, using a thick layer.
- Per the instructions, you leave on for 3 minutes. I’ve done 3 minutes in the past, and it works just as well as leaving it on for 5 minutes and 15 minutes
- Rinse off when completed
- Remove the stencil
What is Rub N Buff
I call it magical – but if you want something more technical – directly from their website: Formulated from Carnauba waxes, fine metallic powders, and select pigments for a finish no paint can duplicate. Rub onto clean, dry, or previously painted surfaces or on post-fired ceramics with a finger or soft cloth, then gently buff to a beautiful luster. More buff, more shine! Five times more product than other brands.
Using the Rub N Buff
The best method I found is to use Rub N Buff is to put a few small drops directly onto the etched glass, and using a towel rub it in. It only adhered to the etched glass and did not adhere to the smooth glass. If there was any smudges needing to be cleaned up, I was able to easily clean it up by using a wet towel. The Rub N Buff is very thin and has a strong odor of that reminds me of paint thinner. If you are sensitive to smells, you will want to take into consideration doing this in a well ventilated area. I used it right at my kitchen table with no issues. I did at first try using a paint brush with the Rub N Buff, but the towel was by far the way to go!
Armour Etch – Glass Etching Cream Experiment Results
- There was little to no difference between the one with the etching cream left on for 5 minutes vs. 15 minutes
- The most important factor is even coating. Going forward I will leave the etching cream on for more than 5 minutes, but I will be periodically brushing/moving the etching cream around for a consistent application (which is how I did my shadow box). This way, the etching will be even with no gaps. I had gaps in both the 5 min and 15 minute coasters, I attribute this to not brushing the cream and not getting an even coating.
- By far, the etching with the Rub N Buff is the most prominent. It looks amazing! I did rub n buff half the coaster below so you can see the difference adding Rub n Buff makes, and
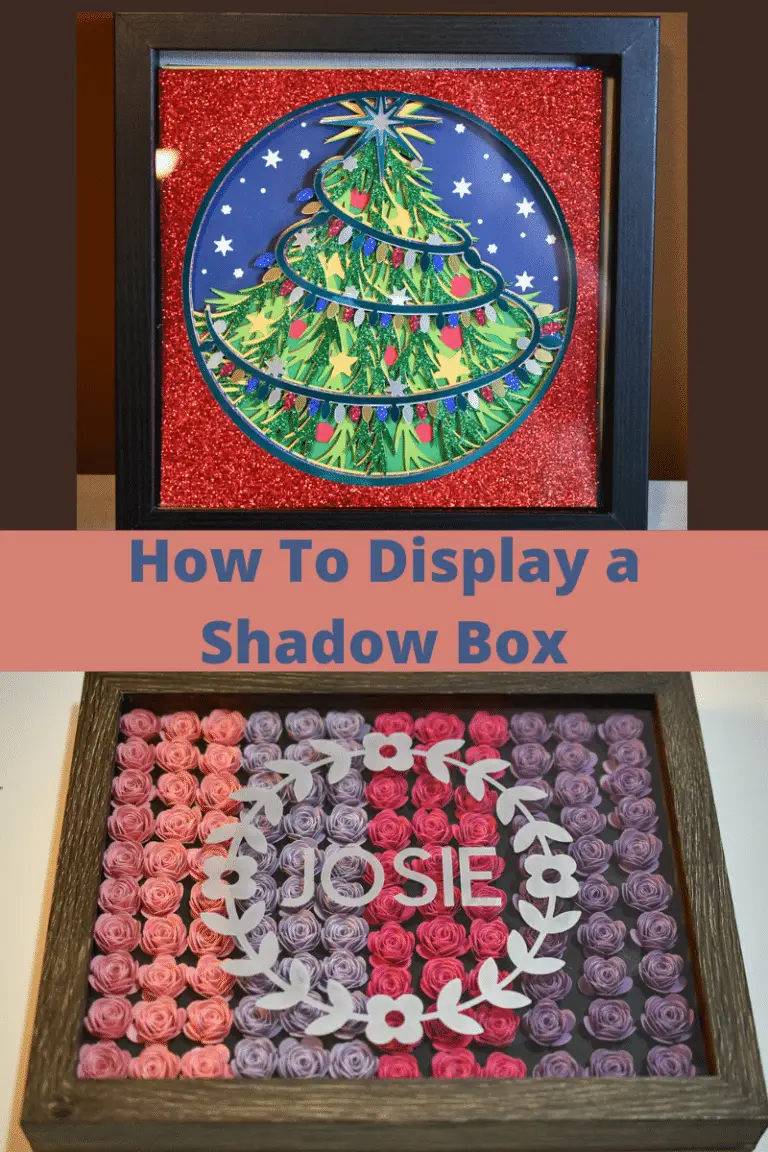
Cricut Paper Flower Shadow Box Update
As I mentioned above, I made a shadow box as one of my first projects. After working on the coasters above, I decided to disassemble the shadow box and use the Rub N Buff on it. It came out amazing!! Dab a few specs all over and rubbed until it looked the way I liked. Add it in phases, so a few spots, then a few more until it was just right. It pretty much stayed right to the etched areas, but at the end I did use a cloth dabbed in water to clean up some streaks. It worked great and looks so much better!
Lessons Learned
- Make sure to have an even coating of the Armour Etch on your design.
- I recommend periodically brushing the etching cream around to make sure you’re getting good coverage
- When making any decorative items, I will absolutely be using Rub N Buff to bring out the etching – dabbing a small amount directly onto the glass (over an etched area) and spreading it around was the most efficient way to do this. Adding more Rub N Buff in small amounts until you get your desired look.
Connect with Me!
If this inspired you to make something, I’d love for you to tag me on instagram or use the hash tag If you liked this post, it would mean a lot if you would follow me on Facebook and/or Pinterest.

Thank you, Tasha! This article is very informative and helpful. I have tried Rub ‘N Buff once on glass. This was without a stencil on a glass vase. I engraved the vase with a flower design and name at the public library using a Trotec Speedy 300, 80W laser.
When I applied the Rub ‘N Buff (gold,) it adheres not only to the engraved areas but to the smooth (unengraved) areas. I buffed and buffed and could not remove it from the smooth areas. I finally used rubbing alcohol to remove it, but it also removed the Rub ‘N Buff from the engraved areas. Any tips or tricks for me?
I am now running a test on a glass candle holder. The glass was masked before etching with a laser. I have left the masking tape on. For half the design I am using Rub ‘N Buff. For the other half the Armour Etching Cream and Rub ‘N Buff.
That’s so interesting. I’ve never had an issue with Rub N Buff sticking to the smooth glass. If it has been a little stubborn I can usually use a wet paper towel to remove from the smooth area.
How are you applying the Rub N Buff to the glass?
Also, would love to hear how your experiment goes with the etching cream vs. Laser!