Can You Etch Colored Glass
Since I got my Cricut, my top two favorite things to do are make paper flowers and etch glass. Today – I sought to answer a question I’ve had – can you etch colored glass? I’ll walk you through why the answer is yes, as long as it is true stained glass.
When using etching cream, it is possible to etch colored class. However, the glass itself needs to be stained glass. It cannot be regular glass that is painted, dipped or has a film over it. Etching cream will only work when it comes in direct contact with the glass.
I etched a piece of stained glass and a purple vase I got from the dollar store to test the results. Read on to see how it worked!

This site is a participant in the Amazon Associates program, as well as other affiliate programs. As an Amazon Associate, I earn from qualifying purchases. This post may contain some affiliate links for your convenience.
How Does Etching Cream Work?
According to their site, Armour Etch is a fast acting specially formulated glass etching compound that lets you create permanently etched designs on windows, mirrors, and household glassware. It does not work on plastics, some pyrex, or coated glass. It is also not recommended for large areas.
According to the Safety Data Sheet from glassetchingsecrets.com Armour Etch contains Ammonium Bifluoride, Sodium Bifluroide, Sulphuric Acid, and Barium Sulfate.
Etching cream works by applying it to glass, letting it process for about 3 minutes (I usually do 5), and when rinsed off the glass is etched.
It is a hazardous chemical, so they do recommend good ventilation and safety equipment, and you should follow the safety instructions provided on whatever glass etching cream you buy.
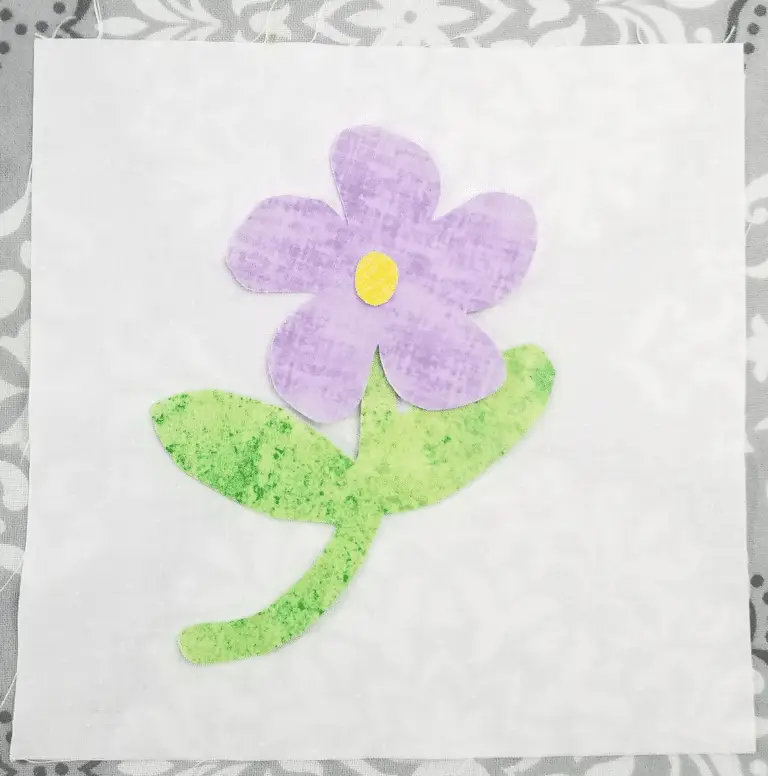
Check out my favorite project of all time: a Paper flower shadow box with etched glass
Materials Used and That I Recommend
Here are some products I reference throughout the post and how you can buy them on Amazon.
- Rub N Buff
- Armour Etch
- Paint Brushes
- Vinyl (used for stencils)
- Cricut (used to make stencils)
- Reusable Stencil (if you don’t want to make one)
Can You Etch Colored Glass
As stated above, yes, you can etch colored glass. However, the glass itself needs to be colored.
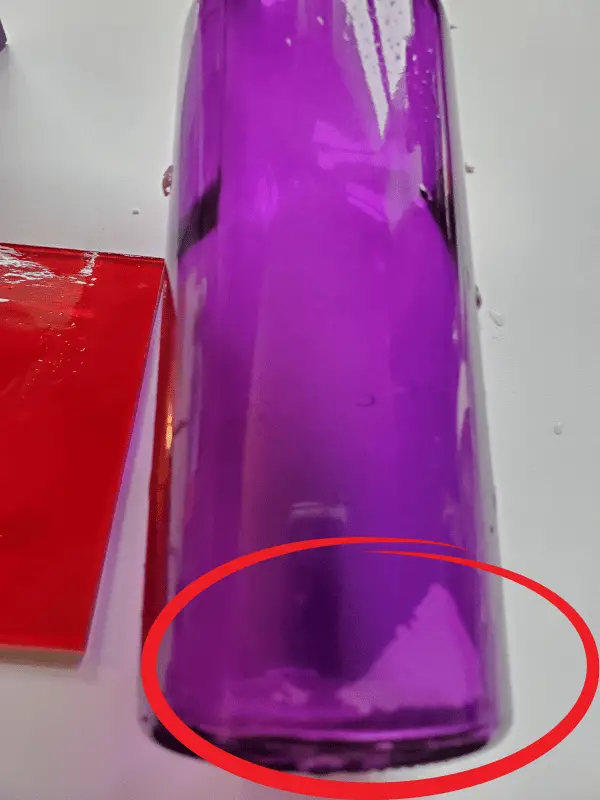
I attempted to etch a piece of stained glass and also a purple glass vase I bought at the dollar store. I’m not an expert, so I couldn’t tell if the vase was glass or had a film.
However, once I put the etching cream on, I could see that the cream was almost sliding around on the purple vase. And when I removed my stencil, there was no trace of etching and in fact, I ripped up a small piece of a purple coating that was stuck to the vase. You can see this in the picture below (red circle).
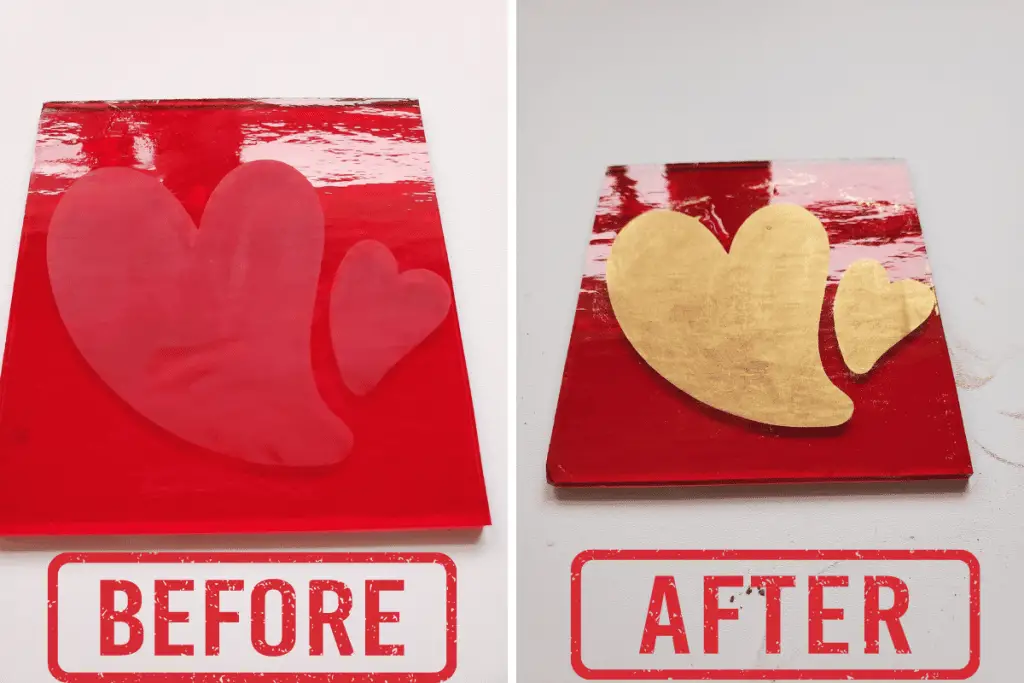
However, the stained glass is etched beautifully. When coupled with gold Rub n Buff it looks stunning! In the photo below the first picture is before Rub n Buff, and the second is after!
Detailed instructions on how to etch glass and use Rub N Buff can be found here.
How to Etch Colored Glass with Armour Etch
Here, I will provide a quick overview on this, but I do have an in-depth post that goes over this topic you can check out here: https://handcraftedhomegrown.com/armour-etch-glass-etching-cream-and-rub-n-buff/
- If you’d like to, create a stencil. You can also buy a stencil, or freehand apply the cream. However, I don’t think it would be very easy to be precise with the etching cream
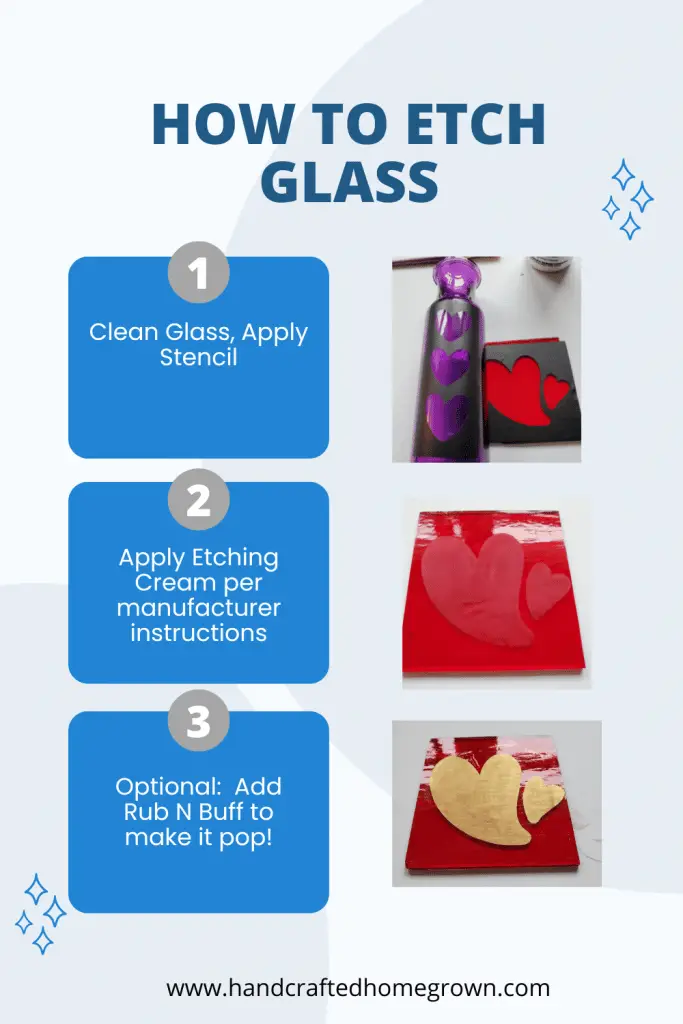
- Clean the glass with alcohol then apply your stencil
- Read the instructions and follow all safety measures as recommended
- Apply the etching cream, and leave one for 5 minutes (or whatever the instructions on your particular cream are). I do use a paintbrush to move the etching cream around every 30 seconds or so. If you don’t, I do find it comes out blotchy.
- Rinse the etching cream off. I take the paintbrush to the sink with the stencil and use the brush under the water to rinse off the cream. In the end, you have a clean paintbrush and etched glass – win-win.
- Remove the stencil.
- You can then optionally use Rub N Buff to make your etching pop out. It is no secret, I love Rub N Buff. The easiest way to do this is to apply a small amount of rub n buff to a cloth and just rub it all over the glass. The Rub N Buff only sticks to the etched portions. On the red glass, I etched it did stick in a few other places, likely due to imperfections in the glass. I was all about it. But if you don’t like that, you can be more careful about where you rub it. I literally put it on the cloth and rubbed it all over the piece of glass without any care.
How To Tell If Glass Has a Coating
So you’ve found some glass you want to etch, but you’re not sure. There are a few things you can do to try to tell if there is a coating on the glass that would prevent it from being etched.
- If it has a raw edge, you can take a look and see if you can see a visible change from the interior to the exterior part of the glass
- In my case – I had a vase, no raw edge. I could have likely used a knife to see if the exterior would peel
- Be smarter than me, and do what I did in a more efficient way. Do a test patch, maybe on the bottom or in the area, you would otherwise etch. Apply a little bit of cream wait a few minutes and see if it works.
- Do exactly what I did – and apply a stencil and apply the etching cream as if you were confident that it was the proper kind of glass and see what happens
- If it is something you haven’t purchased yet that you’d like to etch, you can ask who you are buying from if there is a coating or film on the glass that would prevent it from being etched
- If you have other suggestions for me – I’d love to hear them!
Wrap Up
If you liked this post, it would mean a lot if you would follow me on Facebook, Pinterest, or Instagram. If you use #handcraftedhomegrown on Instagram, I’ll be watching! 🙂
It would really help me if you pinned this post on Pinterest! Thank you!