How to Create a SVG from a Photograph
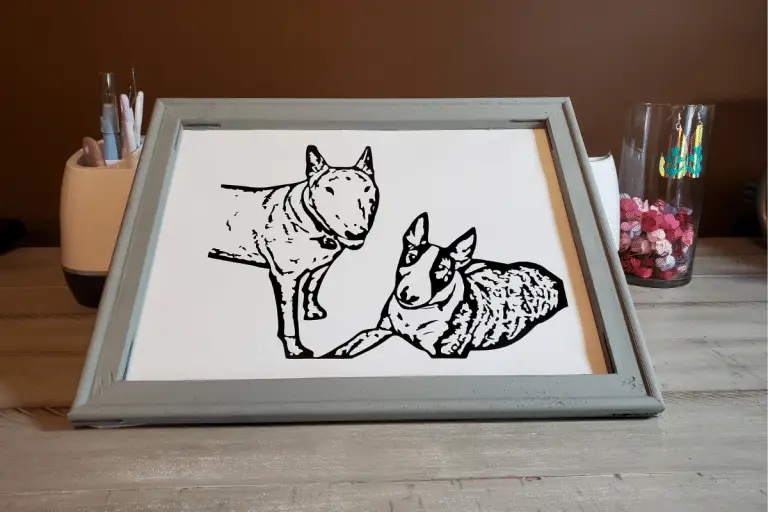
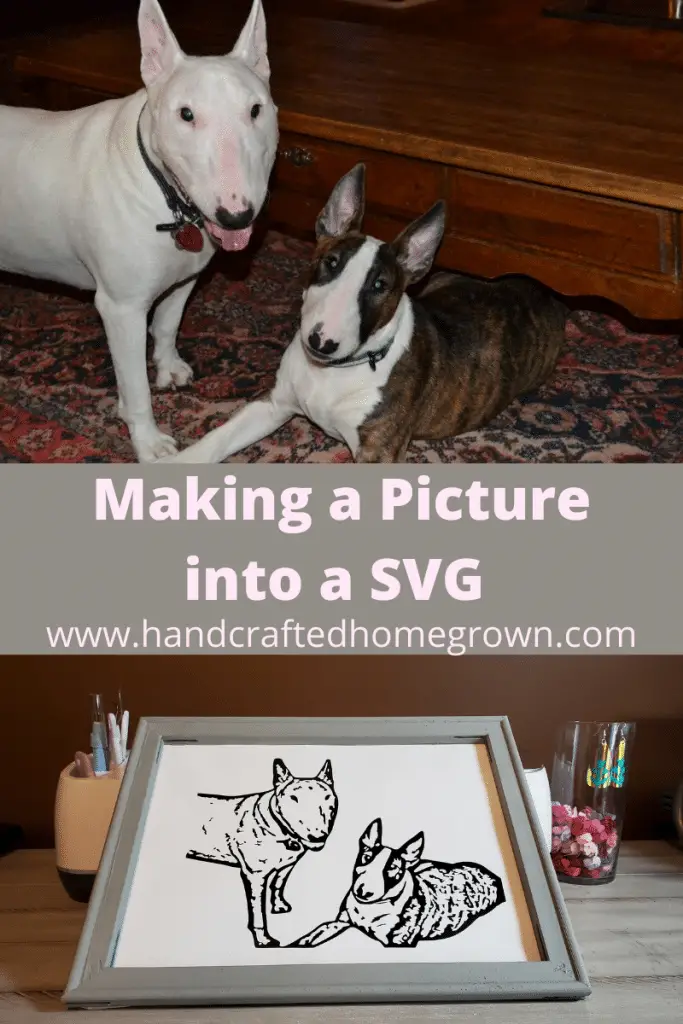
I recently bought myself a Cricut. One of the very first things I wanted to make was a project from a photograph. In fact, before I even received my Cricut Maker in the mail, I began working in Design Space to try to create the SVG. After a lot of trial and error and research, here is the easiest method I found while using free tools and as a complete beginner. To begin, you want to select a photograph of your pet that you would like to make into an SVG. Here is the photo I selected and the SVG it became. The more contrast the subject has from the background makes this process easier. But, it doesn’t hurt to try a few different photos to get a good feel for this!
This site is a participant in the Amazon Associates program, as well as other affiliate programs. As an Amazon Associate, I earn from qualifying purchases. This post may contain some affiliate links for your convenience.
Step 1: Remove Your Photos Background
First, I went to https://www.remove.bg/ to remove my background image. Mine did a great job of removing the background right off the bat. But if it doesn’t work out to your liking, you can use the tools under the “edit” button shown in the top right corner of the photo below to help clean up your image. Once you’re happy with your photo, press the download button and save the file to a place on your computer that you can easily find for the next step.

Step 2: Convert your Photo to SVG
Your next step is to head to Free SVG Converter (picsvg.com). Select the large green button called “Upload a Picture”. Then flip through the different filter options (circled in red below) to find one that best suits your needs. In my case, Invert #4 was what I liked the best. Once you’re happy, select “Download SVG” and save the file to a place you can find easily, so you’re able to upload it into Cricut Design Space.

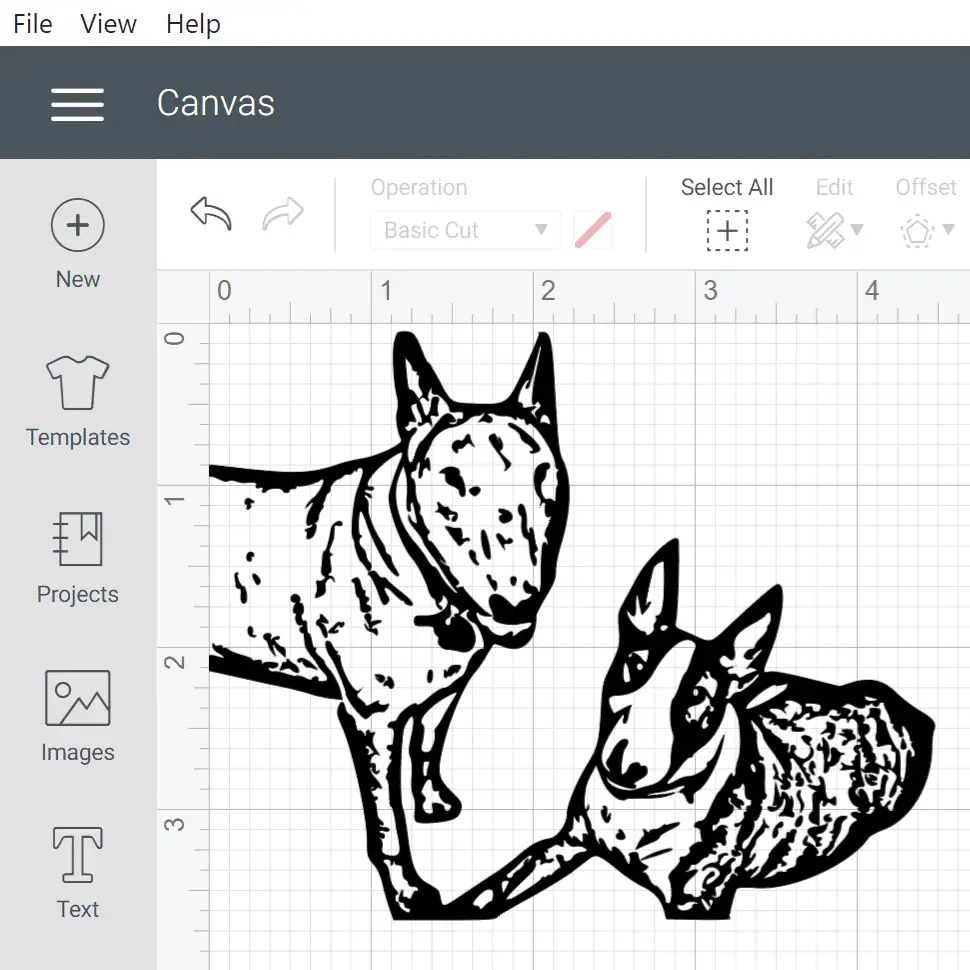
Step 3: Upload your SVG into Cricut’s Design Space
First, open up design space. Then, select new project. On the right hand side down at the bottom select upload the SVG you saved. From here, you can insert the SVG into a project like you would any other SVG, and you’re ready to go! You can ungroup the SVG to delete any extra little bits if you would like to further clean up the SVG. I do select all and weld when I’m finished so it will cut in as few pieces as possible. Depending on your photo there could be a lot of little pieces. This is why I do choose to work with Heat Transfer Vinyl (HTV) as much as possible because its easier to weed.
Step 4: Create!
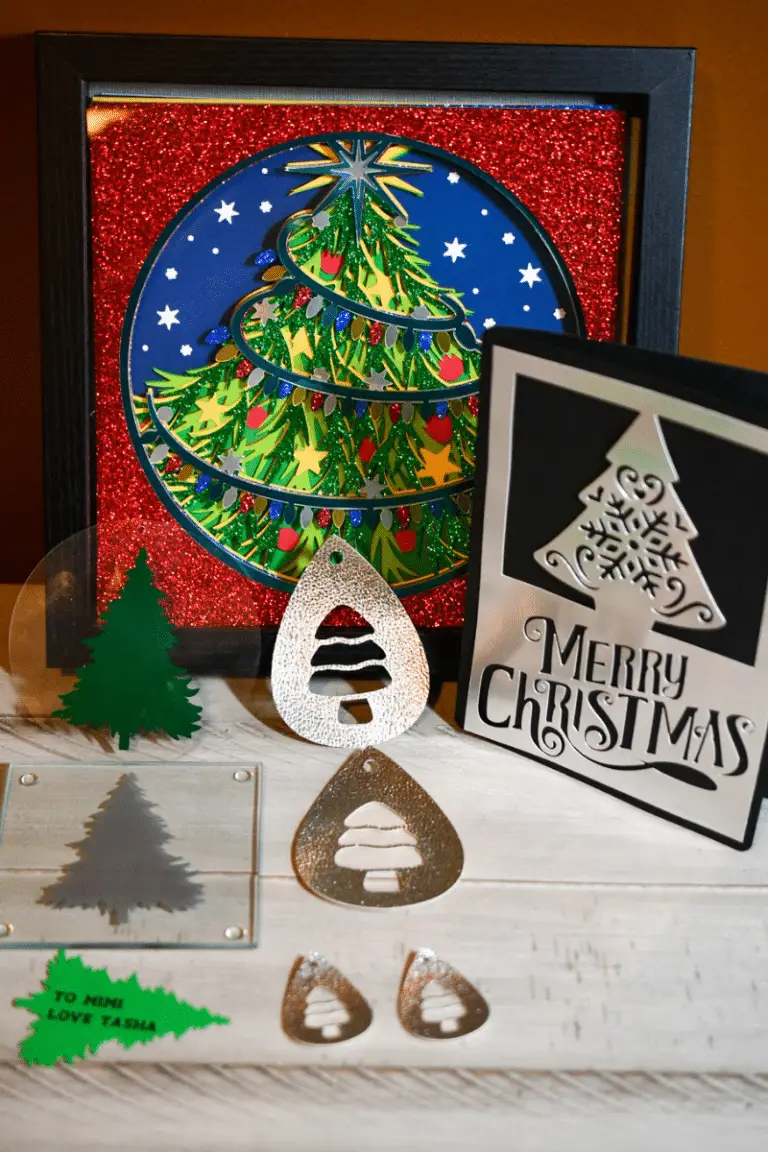
Now that you have your SVG, what are some things you can do with it?
- Create a reverse canvas, see this post
- Make a vinyl decal and apply to a Christmas ornament
- Use heat transfer vinyl and apply to a canvas
- Apply to a color changing up
Wrap Up
If you enjoyed this post, it would really make my day if you would follow me on Facebook and Pinterest.