How do I Cut One Image Out of Another Cricut?
After buying my Cricut, one of the first things I wanted to do was learn how to make stencils and how to cut one image out of another. After a few tries, you’ll be using the slicing function in Circuit Design Space to come up with all kinds of interesting designs!
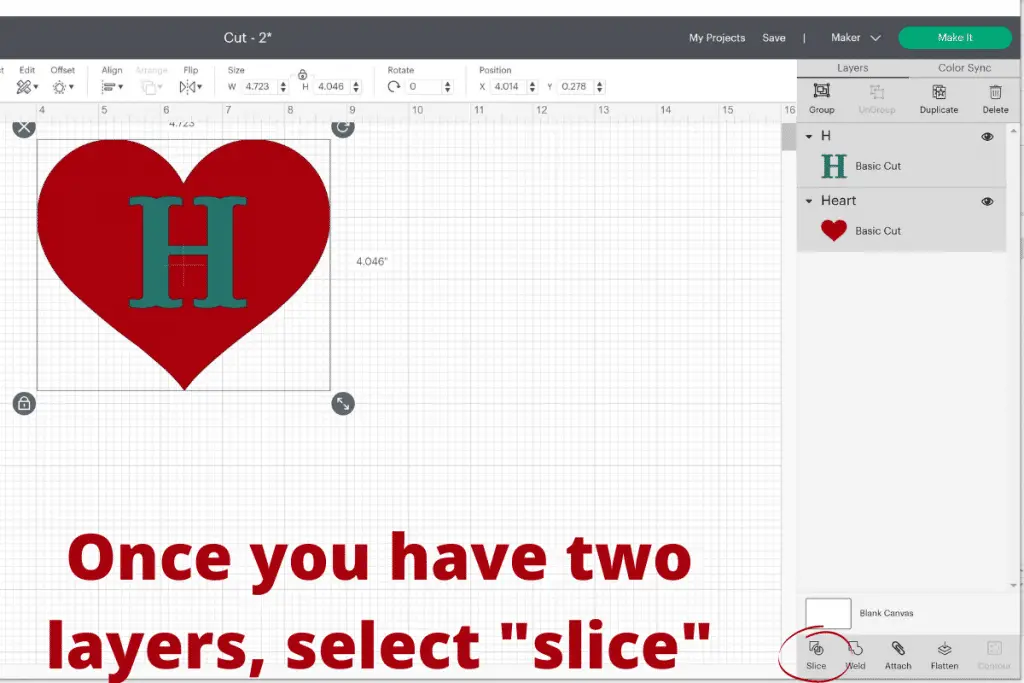
To cut one image out of another using Cricut design space, you need to use the slice function. The slice function can only be done with two layers selected. If more than two layers are selected the function will be grayed out and you will not be able to use the function.
What is the Slice Function?
In order to cut one image out of another in Cricut Design Space, you will use the Slice function. This function is exactly what it sounds like. It takes two layers and slices them through each other wherever they are overlapped. This is great for stencils.
How do I Slice One Image Out of Another Cricut?
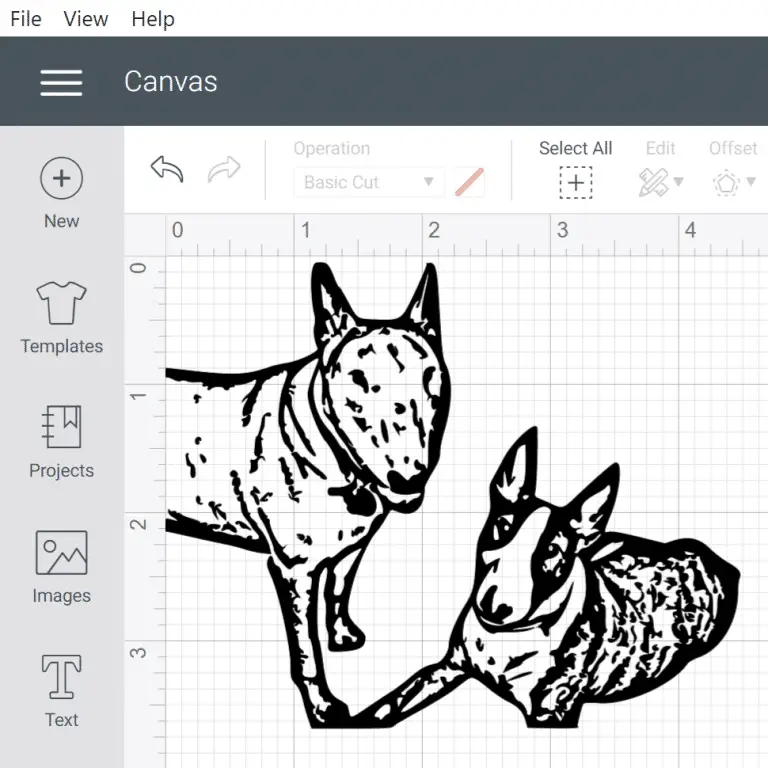
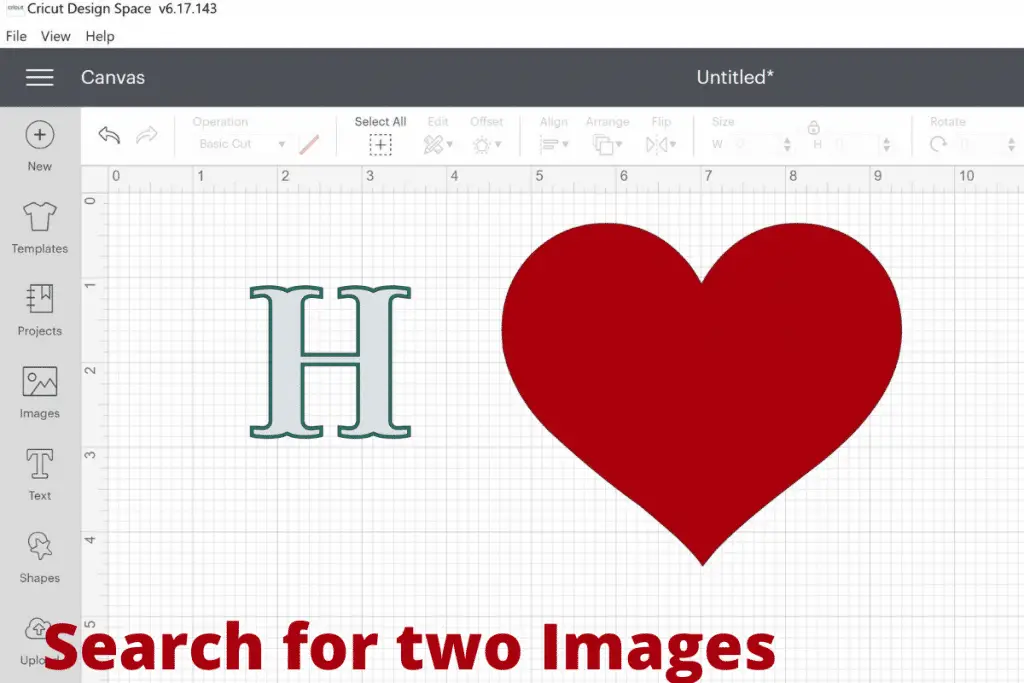
Step 1: Insert two images
The first step to cutting one image out of another in Cricut is finding the images. First you need to insert the image you want as the “main” image, in my example – the heart. And you need the image you’d like to slice out of it, in my example the “H”. I went through Cricut’s image library and found the two images below, and want to cut the H out of the heart.
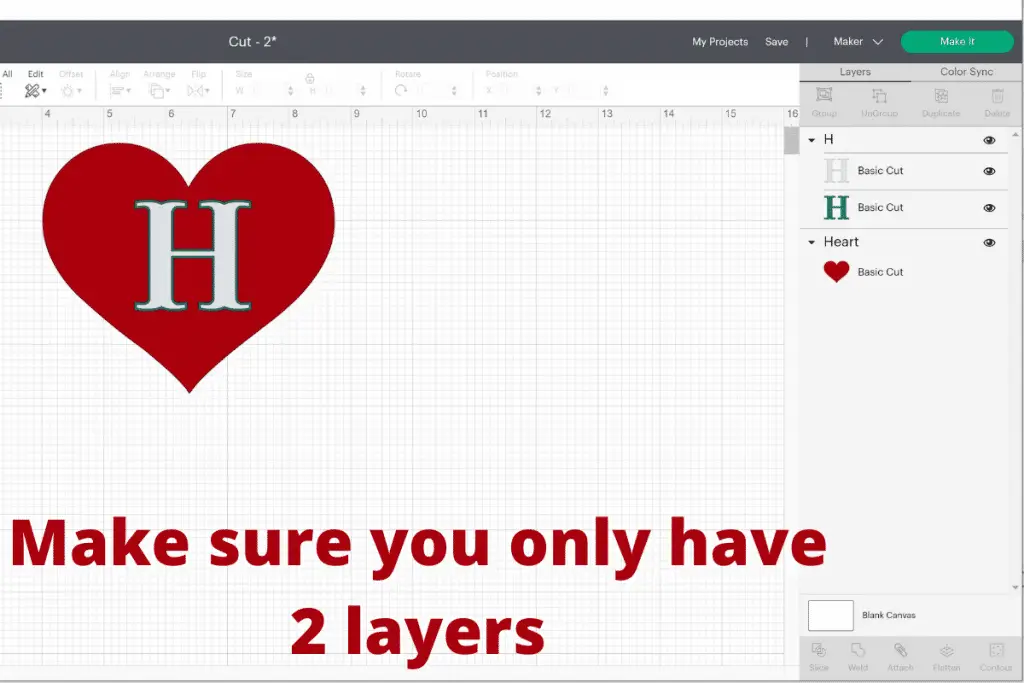
Step 2: Make Sure You Have Only Two Layers
In order to slice an image through another, you can only have two layers. This was the biggest thing I was doing wrong over and over when trying to do this. In the image below, you can see over on the layers panel, there are actually 3 layers here. The H is made up of a green and gray portion. There are a few ways to resolve this, depending on your situation:
- Deletion – delete one of the H layers
- Welding – select the two Hs and weld them together. This makes them a single layer, and therefore able to be sliced
- Different images – if you can’t make the two choices above work, you can also select a new image to replace the one that is made up of multiple layers
- Taking it 2 at a time – If you have a larger background image, and wanted to slice two images through it, you could do it in phases. First, select the background and the first image and slice. Then select the background and the second image and slice. You now have both images sliced through the background.
Attaching and flattening images together will not work to combine them into a single layer for slicing.
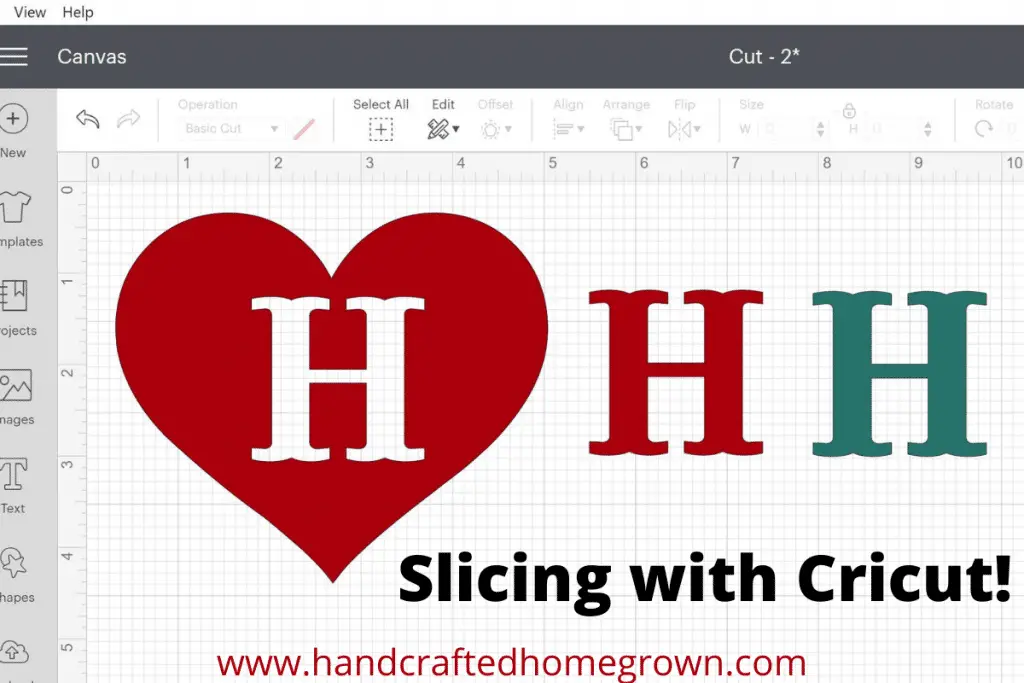
Step 3 – Slice!
This is the easy part! Once you have only two layers selected, you’ll see the slice function in the bottom left of the layers panel. By selecting this in my example below, the H is sliced through the heart background. If the function is not available to be chosen, it is most likely because you have more than two layers selected.
Step 4 – Final Result
As you can see below, after performing the slice function you will have 3 layers:
- The background with the image sliced through it
- The slice of the background that was removed
- The image that was used to slice – in this case, the H

What Kinds of Projects Can be Done with Slice?
- Stencils – I use the slice function to create stencils to etch glass. Essentially, I insert a square/rectangle and slice through the image I would like to etch. I make sure the square/rectangle is large enough to protect the area needed, and then slice to make my stencil. Then I can use vinyl to etch glass.
- Faux Leather Earrings – you can create adorable earrings that can be customized to your desire. Find a blank earring template, or even just an oval. Cut out a spot for the hardware and your desired image, you can come up with some many cute things!
- Vinyl decals – by using the slice function you can slice someone’s name or a date through any solid background image and place on cups, laptops, cars – any flat service you can think of
- Gift Tags – You can create customized gift tags
Tips for Making Stencils
At first, I was really excited to use this function to create stencils for glass etching. But I made a few mistakes in the beginning.
The biggest mistake I made was having too intricate of details in the image being sliced. Most of my stencils have been pretty small to fit on coasters or Christmas Ornaments. If there are little cut outs or intricate details, its much more difficult to get the stencil to stay put or get applied properly. So the first few stencils, I’d really recommend nice clean lines with no details to get the hang of it.
Second tip for making stencils, make sure you give yourself enough coverage with the background square/rectangle. If you have only just a little bit of space between the design you cut out and the edge of the background, you won’t have much protection in your stencil. You want to make sure you give yourself space to apply etching cream, paint or whatever you’ve got planned.
Wrap Up
If you liked this post, it would mean a lot if you would follow me on Facebook, Pinterest or Youtube.